3D Printing Is A Fun yet Rewarding Cruel Mistress.
Ever since I was 8 or 9, the idea of 3D printing seemed amazing. Objects appearing right before your very eyes, with nothing more than a computer file and a roll of plastic. Now the 3D printer that I saw didn’t really exists, as it was a piece of concept art from a book about technology I had bought at a Scholastic book fair, but when I saw it I thought it was science fiction. An idea. Nothing more than a picture in a book and an idea. I had no idea that no only was it going on at that time, but I wouldn’t have though that in the not-so-distant future I would be one of the many early adopters of the technology.
I hear you fanatics out there, “Its 2019, what do you mean early adopter?” I mean exactly what I said. I love 3D printing, I would make it my career if I could (and as a computer engineering student I certainly could), but its not something that is ready for consumer use. Hobbyists like myself love it, allowing us to design concepts in our mind, either find preexisting models on sites like Thingiverse or GrabCad or make our own in software like FreeCAD or Fusion 360, compile the file to machine code, then run that machine code on our printers as it turns a spool of plastic wire filament into what we see as a masterpiece. This is all fine and dandy, bit this is far from what the experience actually is, and if this was all the experience, you would see tons more 3D printers in homes by now.
How is this not the whole experience? Well, there is a hell of a lot more tinkering, troubleshooting, assembly, knowledge of the material (both in a manual and in a sense of how printer material behaves), and experience with actually printing the objects that you will need. You can look at articles online all you want, but just reading about how “easy to use” these printers are is not going to make you an expert in actually using the things, I have only been printing for about a year and I am still not an expert of the subject. I have very little experience relative to the 3D printing veterans and professionals in this community, then again this entire community is about tinkering, trying new things, being creative. There is no one way to do anything.
The biggest obstacle is configuring your printer right and getting everything perfect so that your prints turn out well. After configuring the resolution, print speed, temperature (material makes a giant difference), and any other configurable setting, you’re ready to print. Sort of. You have to make sure your bed is even with the nozzle, so that your prints turn out smooth and consistent. You have to make sure that the stepper motors are correctly calibrated, that the spool is fully inserted into the nozzle so that the material comes out, along with making sure its feeding correctly. Its a process, but one that will reward you.
My Creality Ender 3 is one of the cheapest yet most reliable printers you can buy right now, and chances are if you’re a beginner and you want the quickest yet cheapest start, this is the printer that the pros will recommend. Sure you could buy something insanely cheap like an Anet A8 or another ~$100 3D printer, but the quality will suffer. You get what you pay for for the most part. Given, I have had prints that surpass the 3D printers at my school, the Makerbot Replicator 5, but they took DAYS to complete, versus a few hours on the Makerbots. Given as a college student who lacks both time and money, added the fact that I can leave a print running overnight or over a few days, I will make that sacrifice. I also added a Raspberry Pi running Octoprint so that I can remotely start and monitor my 3d prints.
The Ender 3 comes partially disassembled in the box, taking an hour or two to assemble. Once put together READ THE MANUAL. My lack of reading and my extreme impatience is the reason that my first few prints were complete garbage. Next, buy decent material. I recommend you start with PLA as it’s the easiest to print with, but don’t cheap out on where you get it from. I bought Inland PLA and I have had the most mixed results. One print turns out great then the next is garbage. This is because the tolerances are so varied that the extrusion rate will change randomly. This causes anomalies in your print, such as blobs or gaps in your prints. Hatchbox is the company that I would recommend as a budget option, with the Amazon Basics line of PLA as the backup option. I also recently purchased Inland’s PLA+, which is supposed to tighten those tolerances and increase print strength. None of this will matter if you don’t READ THE MANUAL. I know as a man I tend to skip that kind of stuff because “I can figure it out” but DON’T DO THAT. If you are not keen on reading, look up some videos on Youtube or something. Just don’t go in head first.
One of the more important things about 3D printing that many people overlook in the beginning is a properly leveled bed. Without a properly leveled and adhered bed your prints will not stick and begin to either shift or clump up, ruining your print. Most - if not all - printers cannot detect when a print is not adhering to the bed and you will waste a lot of time and material allowing your printer to make a clump of plastic. Another important thing is the extruder. It controls the rate at which the molten plastic is pushed out of the nozzle. This is by far the biggest flaw of the Ender 3, as at least in my machine, the Bowden-style extruder is going to be the first thing to fail. You think at first you have a clog, then you change the nozzle and nothing changes so you push the material manually and it works and then you go through literally every possible outcome until you realize that the plastic Bowden extruder arm cracked into two.
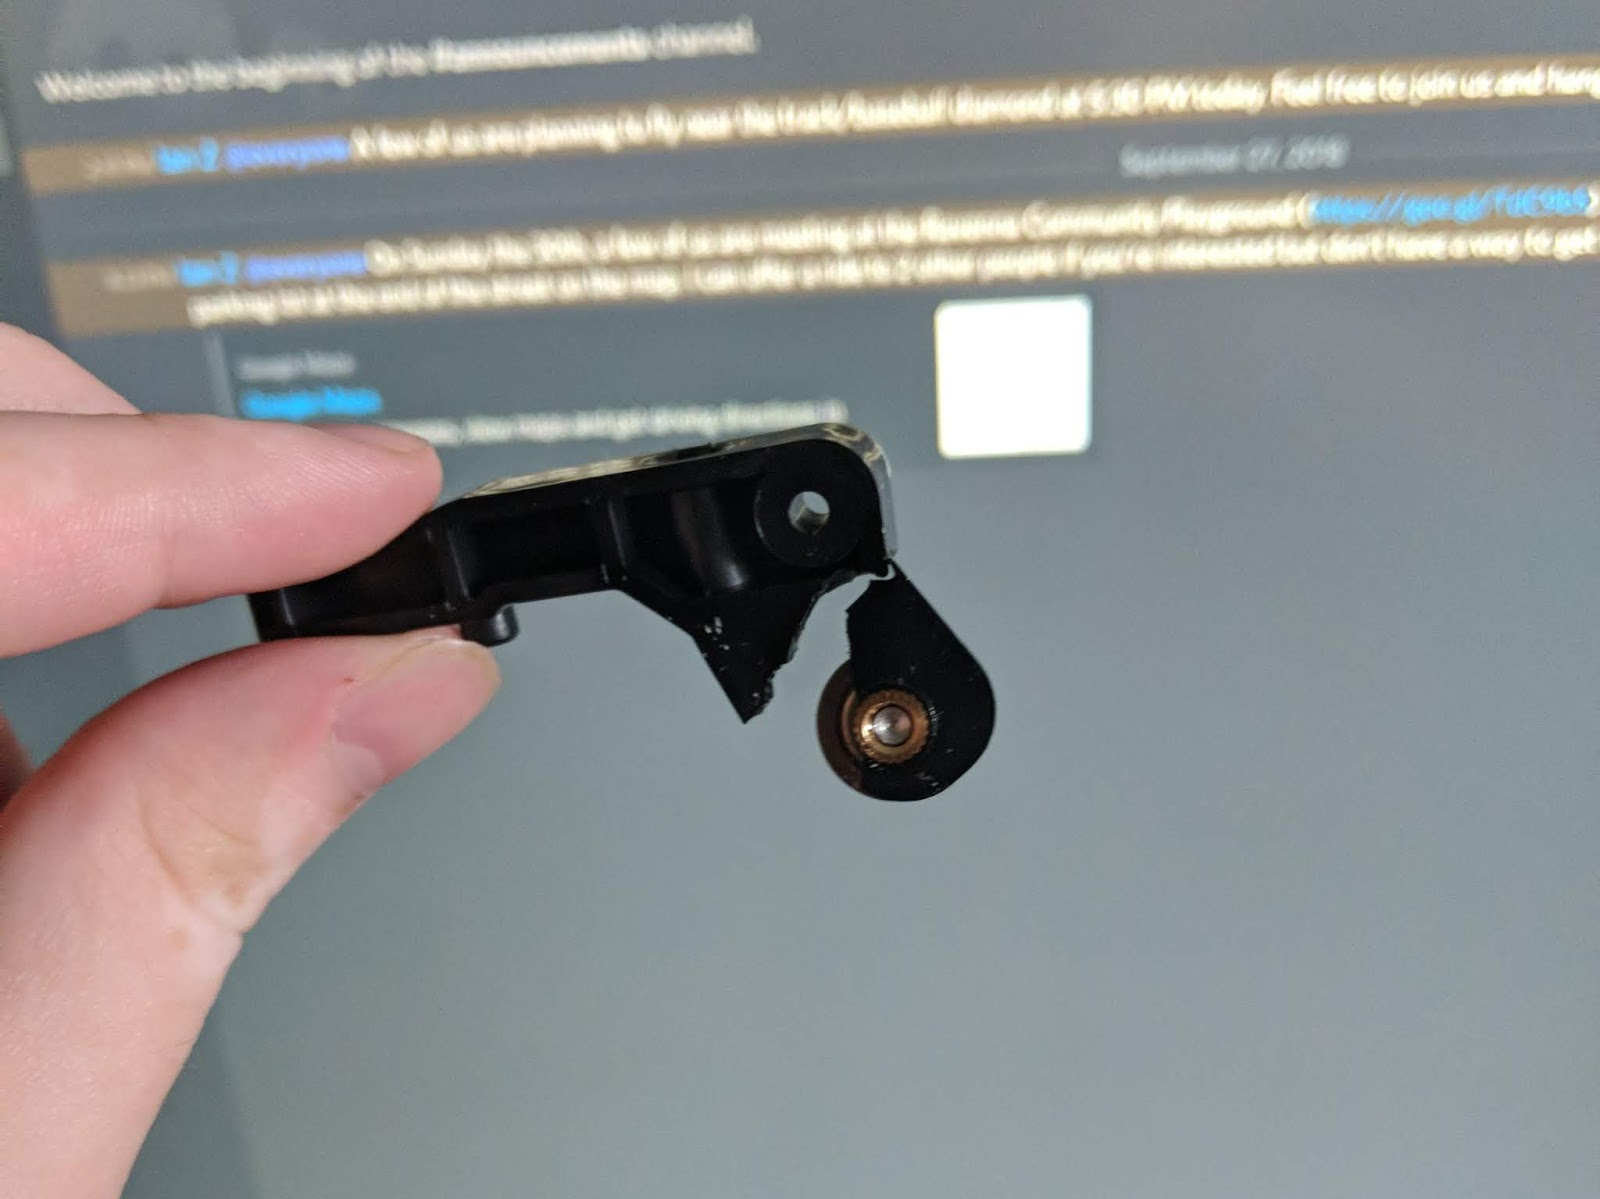
To remedy this, I went and bought this, an aluminum replacement for the Bowden assembly. This aluminum assembly is significantly more durable and better made than the one that comes with the machine. This is what mine looked like after installation:
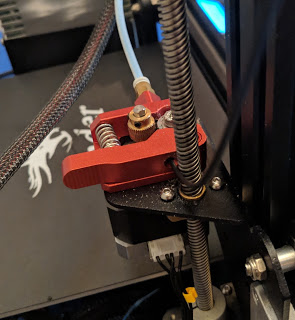
After it’s replacement the printer ran just fine, making beautiful prints. Well it did, until the spring lost tension. For the longest time I have just been shimming the spring but I recently found that Creality sells the extruder springs on Bang Good, which I ordered. After fixing them new springs and recalibrating the printer, its prints beautifully again. I also recently attached a BLTouch using this mount, and forked the Marlin firmware for this change here.
Anyway, that is the intro to 3D Printing. I will make another post with more detail on more advanced strategies at some point, but until then, I would reccomend looking up videos by CNC Kitchen and Thomas Sanladerer for anything about 3D Printing.